Instructional Guide: Active Directory Authentication and First-Time Access to REDCap
Introduction & Prerequisites
This guide will walk you through the process of your first access to the REDCap platform in 9 steps. These steps include signing in via Active Directory, completing authentication using Microsoft Authenticator, and successfully accessing your REDCap account for the first time. Important note: Please wait until you receive the official REDCap invitation email before beginning this process. The account creation is initiated through this invitation, and no manual account creation is required beforehand. Please follow each step carefully and in the correct order to ensure that your first access is completed successfully. This process is required to securely verify your identity and enable your access to the system. If you encounter any issues, please contact the platform support team for assistance. Before starting the 9-step process, ensure you have the necessary hardware and environment ready for a secure first-time login.
Essential Tools for Access
To complete your first access to REDCap, you will need only two essential tools: The phone is used to verify your identity (security), and the computer is used to enter REDCap.
1. Mobile Device
Your mobile phone with the Microsoft Authenticator app installed
2. Work Computer
Your computer with the REDCap access link. Used to access the REDCap portal. Ensure you have your official link and the temporary credentials sent via email.

Step 1: Install Microsoft Authenticator (Phone)
Search

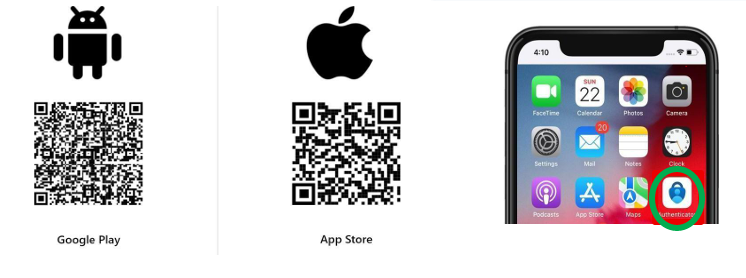
Search "Microsoft Authenticator" in Google Play or Apple App Store or scan QR below.
Install

Tap Install or Get. Download and open the app. Allow notifications and camera access.
Wait

Open the app but do not add an account yet, keep the app open or minimized.
Step 2: REDCapPortal Login (Computer)
 Use Chrome, Edge, Firefox for PC or Safari browser for Mac.
 Important: Open Private/Incognito Window. Follow instructions below depending on your Browser.
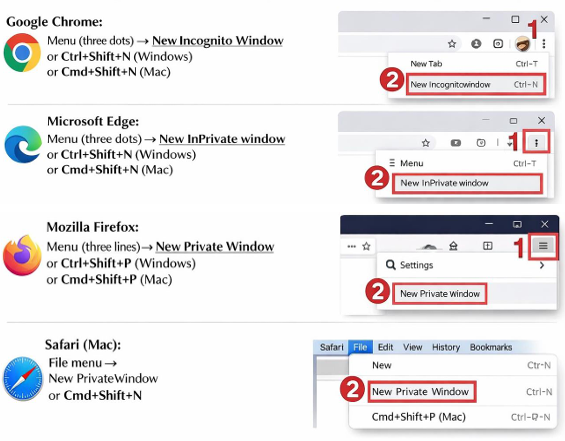
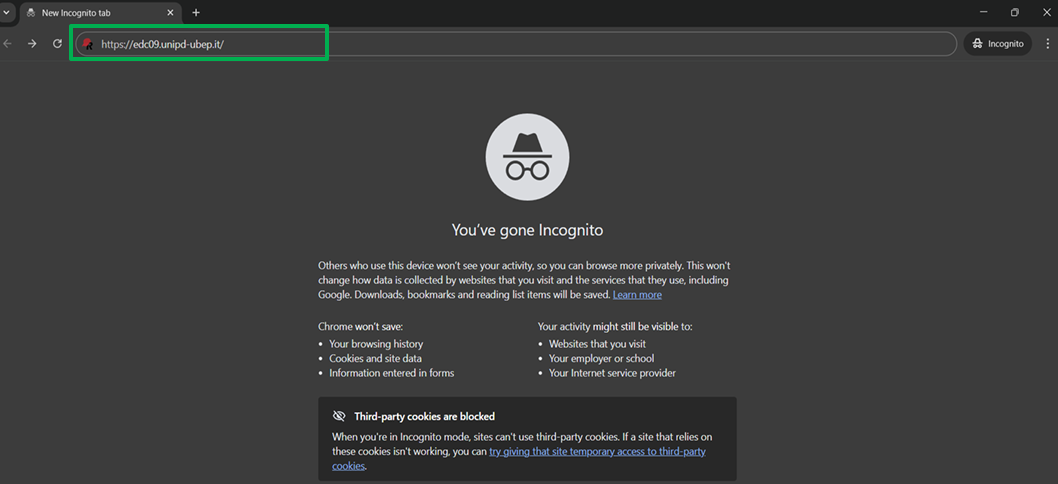
Once you open the platform in a private / incognito browser window (your page might look, similar to the example one below depending on your browser).
 Paste the platform link (that was provided to you by mail) into the address bar.
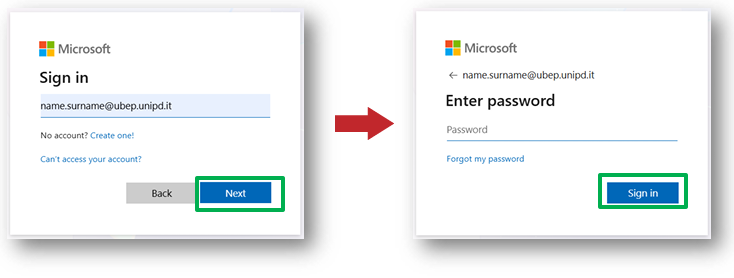
In the Microsoft window that appears, enter credentials provided in the email:
 Username (name.surname@ubep.unipd.it) .Click Next.
 Then enter temporary password provided by email. Click Sign in.
Step 3: Set your new Password
Password Change
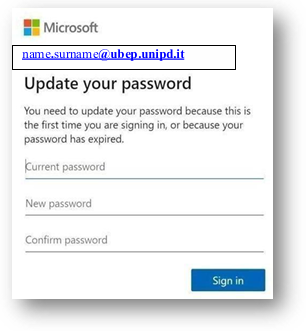
On your first login, the system will prompt you to update your password immediately. This ensures only you have access to your account.
Proceed with the password change by typing:
1. In Current password, enter the temporary password.
2. In New password, choose a personal secure password.
3. In Confirm password, repeat the new password.
4. Click Sign in
Step 4: Begin Security Verification Setup
- When “Additional security required” window pops up, click Next.
- Press Next on all pop-up windows until you get to the window with QR code
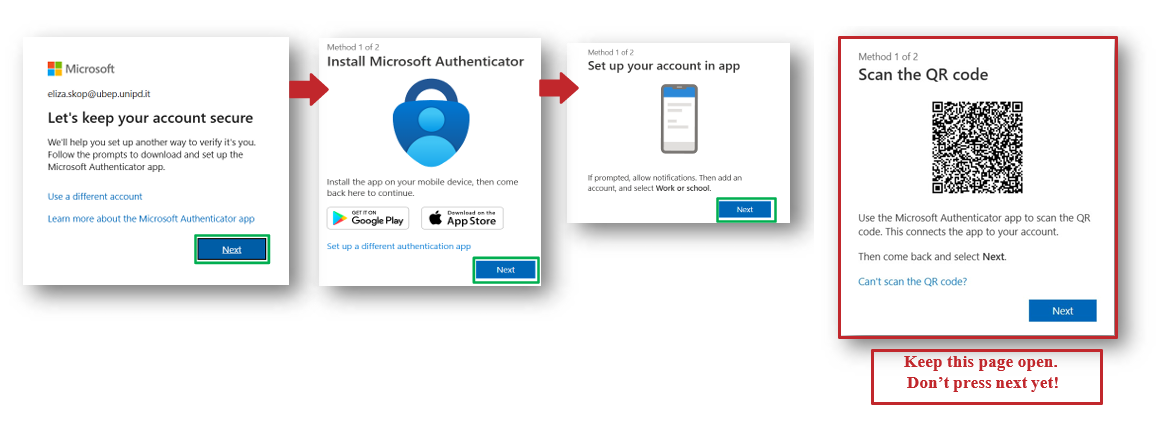
- When page with QR code will appear, keep this page open. Don’t press next!
- Then immediately take your mobile phone and move to Step 5.
Step 5: Add Account to Microsoft Authenticator (Phone)
- OpentheMicrosoftAuthenticator app on your Phone(already installed at the beginning of the procedure – Step 1).
- OnMicrosoft Authenticator press three vertical dots symbol or+ symbol located in the upper right corner of the screen.
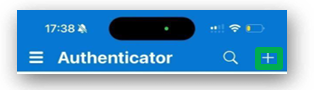
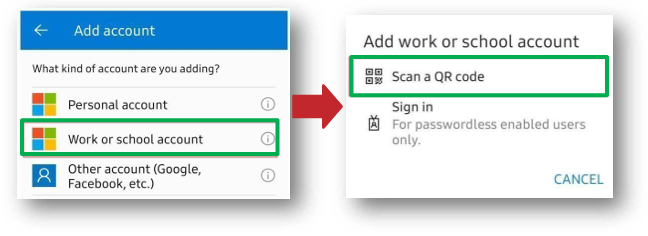
- Select Add account.
- Select Work or school account. *On some phones might be “Business account.”
- Select Scan QR code.
- If prompted allow camera access and notifications or go to Settings and allow push notifications for the app and camera access.
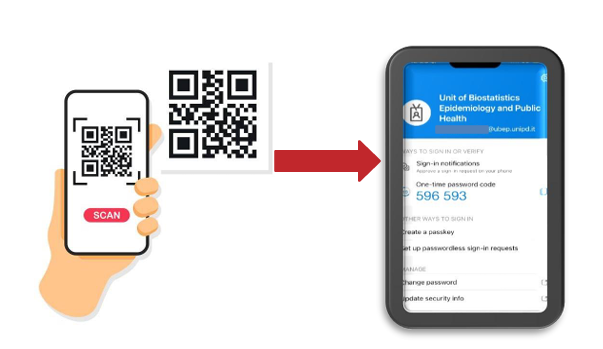
- Scan the QR code shown on your computer screen with your phone.
- After scanning the QR code, the account will appear in the Authenticator app with a 6-digit rotating code.
Step 6: Approve Login Request
- Return to your computer. You will still see the QR code screen where you scanned the QR code before. On this screen, click Next
- Return to your phone. A notification from Microsoft Authenticator will appear. Tap the notification to open it. Inside the Microsoft Authenticator app, you will see a request to Approve the sign-in. TapApprove/Yes. Ifnumber matching is enabled, your computer will show a two-digit number. Enter that number into the app on your phone, then tap Approve/Yes.
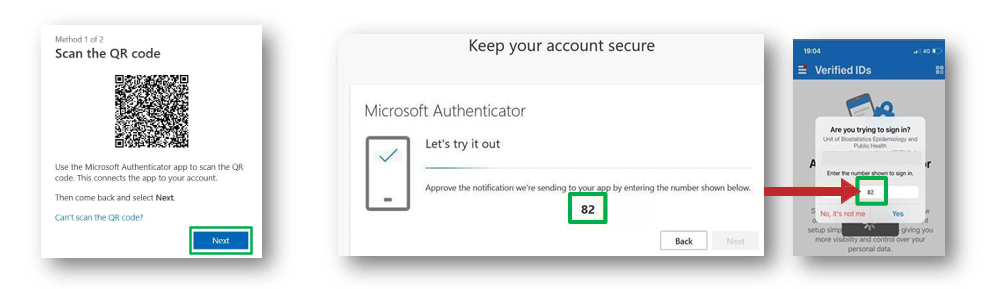
- Return to your computer. The screen will automatically change to a next step. On this new page, click Next to continue.
Step 7: Complete Identity Verification
- Thenextscreen will ask you to “Add your mobilephone number”. Enter your number and click Next.
- You will receive an SMS code on your phone. Enter this code on your computer and click Next.
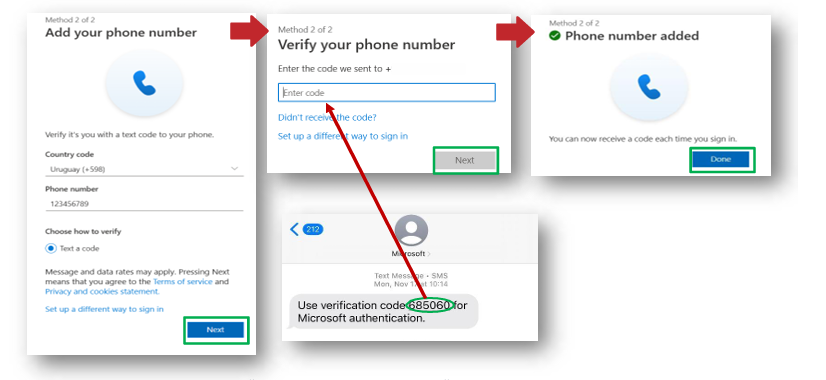
- You will now see a window saying: “Phone numberadded”. Click Done.
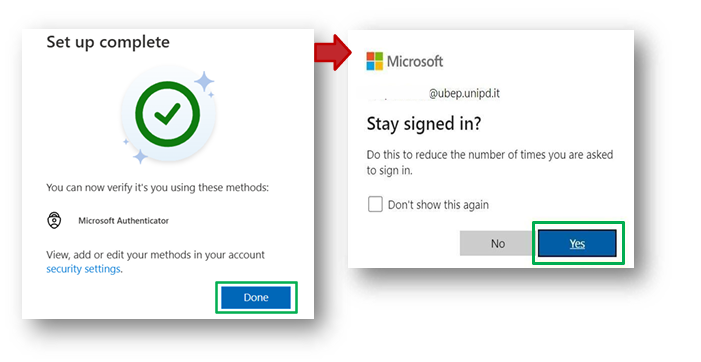
- After that window will appear saying: “Set up complete”.
- Click Done. A security confirmation screen will appear “Stay signed in?”
- Click Yes.
Step 8: Complete User Information & Verify Email
- A Basic User Information Form screen will pop up.
- Enter your First Name, Last Name, and your Personal Email Address Make sure to use your own active personal email address. Note for iCloud users: If you are using an iCloud email address (e.g. @me.com, @icloud.com, @mac.com), you will not receive the verification email due to Apple’s email filtering. Please use an alternative personal email address (e.g. Gmail) to complete the registration process.
- Click Submit. After that “Account Created/ Verification email sent” window will pop up. Leave it and proceed to your email.

- Open the verification email from REDCap. Click the provided link. Pop up window will appear saying “Email account verified!”
- Click Access RedCap.

Step 9: Access RedCAP
- The system will then redirect you and in the screen that appears, you will be in the REDCap Home page.
- Click on My Projects to find your projects.
 You will see a list of projects you are authorized to access, then select the correct project and Click on it to access. The project will open and you can begin entering and managing data.
FAQ and Troubleshooting
Common Issues
Do I need anything before logging into REDCap for the first time? Yes. You need your username, temporary password, access to your email, and a smartphone for the authenticator app.
Which authenticator app should I use? Microsoft Authenticator.
Why do I need Two-Factor Authentication (2FA)? To protect patient data. REDCap requires a second security layer for all users.
What if the QRcode does not scan? Increase screen brightness and try again. If still failing, use the manual key shown below the QR code.
My 2FA code keeps failing. What should I do? Ensure phone time is set to automatic and use the newest 6-digit code.
I activated my account, but I still cannot log in. Why? Password mistyped or browser issue. Try resetting password and use Edge/Chrome/Firefox.
I logged in but cannot see any project. Is this normal? Yes. Your role has not been assigned yet. Ask admin to assign you to the project.
REDCap website does not load at all. What should I do? Institutional firewall may block it. Try mobile data or VPN; ask IT to whitelist the domain.
CanIuseREDCap on myphone? Login is possible, but data entry must be done on a computer.
Ineedto setup2FA every time? No. Once linked, only the 6-digit code is needed at login.
How do I know first access is completed? If you can log in, see the Dashboard, and open your assigned project.
NeedHelp? Contact the UBEP REDCapTeam
If you experience any issues during the first access process, please contact the UBEP REDCap Team for assistance at ests.data@ubep.unipd.it
We can help you with:
- Active Directory login issues
- Microsoft Authenticator setup problems
- Access errors or permission issues
- General REDCap access support
Please include in your message:
- Your full name
- Your institution
- A brief description of the issue
- A screenshot of the error (if possible)
This will help the team resolve your issue more quickly.
Thank you for your time and cooperation! We wish you a smooth and successful experience using the REDCap platform